
")
")


If you’re a photographer or small business owner looking to showcase your work online, Showit is an excellent platform to build a stunning, custom website. To ensure your images not only look great but also perform well in search engines and provide a seamless user experience, follow these steps to add your images to Showit the right way.
Step 1: Perfect Your Image Editing
Before you even think about uploading your images, take the time to ensure your editing is spot-on. Consistency in editing enhances your brand’s perception and can even justify higher rates for your services. If you’re struggling with editing or need a new Lightroom preset, feel free to reach out for some preset assistance. Consistent and high-quality images are key to making a great impression.
Step 2: Optimize Your Image Naming for SEO
Naming your images correctly is crucial for SEO and will help your website rank better in search engine results. For photographers, this typically means incorporating location and niche into your image file names.
For instance, if you’re a Miami newborn photographer, name your images like this:
Miami-Newborn-Photographer-1.jpgMiami-Newborn-Photography-2.jpg
If you work in multiple niches, apply this same naming strategy across all your areas of expertise: Area-Job-Title-#.jpg. This approach not only helps with SEO but also keeps your files organized. If you’re unsure about what keywords to use, don’t hesitate to reach out for personalized advice.
Step 3: Set Up Your Showit Account
If you don’t already have a Showit account, now’s the time to get one. You can often get a free month or a discount by using a referral link. This will give you access to Showit’s powerful website-building tools.
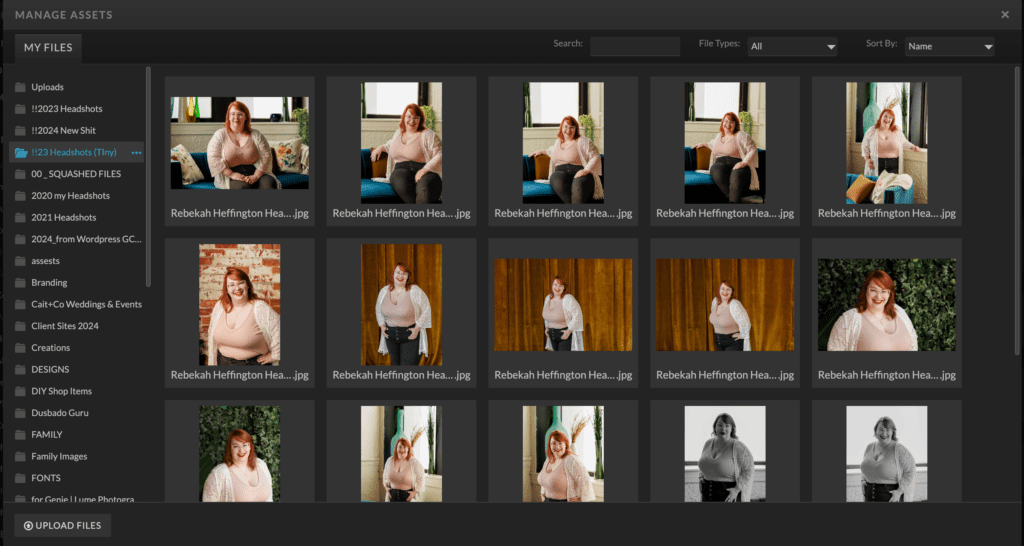
Step 4: Organize Your Showit Media Library
Before uploading, prepare your images and graphics. Create specific folders in your Showit media library for different categories:
- Artwork Examples: Include digital mockups or real samples.
- Best of Family and Wedding: Use these for highlight portfolios.
- Featured Galleries: Showcase individual sessions or weddings to highlight your storytelling.
- Background Images: Save these as 3500px on the long edge. Landscape photos work best for backgrounds.
- Personal Brand: Include photos of yourself.
- Fonts: Upload any custom .WOFF fonts you use.
- Website Graphics: Upload logos and other branding elements.
- Press: Add logos of places you’ve been featured or awards you’ve won. Ensure these are in black or white (or both) and saved as .PNG with transparent backgrounds.
Step 5: Optimize Your Images for Web Use
To ensure fast loading times and good SEO, optimize your images before uploading:
- Export from Lightroom: Set the long edge to 3500px for background images and 2000-2500px for other areas. Save images as JPGs in sRGB color space. To got an extra step further – I set my DPI to 72, and it doesn’t look any different.
- Resize and Compress: Use tools like Short Pixel to reduce file sizes without sacrificing quality. Opt for the “Glossy” setting for optimal results.
Step 6: Upload Your Images
Now, upload your optimized images to the appropriate folders in your Showit media library. Organize them according to the categories you’ve set up to keep everything neat and accessible.
By following these steps, you’ll ensure that your Showit website not only showcases your images beautifully but also performs well in search engines and provides a great experience for visitors. If you need any help along the way, don’t hesitate to reach out for advice or assistance. Happy uploading!


